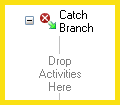
In the Try-Catch activity, a catch branch runs if an error occurs in the try branch. The activity contains two branches by default: a try branch and a ![]() catch branch.
catch branch.
Tip: You can add additional catch branches.
To configure a catch branch
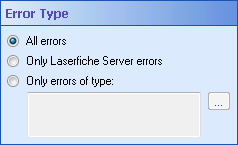
- All Errors: The catch branch will run if the try branch encounters any error.
- Only Laserfiche Server errors: The catch branch will run only if the try branch encounters a Laserfiche Server error. Learn more about Laserfiche Server errors.
- Custom error type: The catch branch will run only if the try branch encounters a specific type of error.
To configure a custom error type
- Click the Browse button (ellipsis)
to open the
Error Type Browser.
- Select an error type by expanding a node under Exception Browser and clicking the error type.
- Optional: If you cannot find the error type you want in the Error Type Browser dialog box, type the assembly qualified name of the exception type in the Assembly Qualified Name text box.
- Click OK.
Note: To use the same custom error for another catch branch, copy the assembly qualified name from the Error Type Browser dialog box or from the read-only text box under Custom error type in the property pane. Paste the error into the other catch branch's Assembly Qualified Name text box in that branch's Error Type Browser dialog box.
Note: Catch branches cannot be canceled or terminated by other activities, such as the Deadline activity. If you place a Try-Catch activity inside the primary branch of a Deadline activity, and the deadline is reached, than the deadline branch will start and run in parallel with the catch branch. When the catch branch completes, the primary branch will be canceled. You can terminate a running catch branch manually, or by using the End Workflow activity.
|
This documentation is specific to version 9.0. You can find the most up-to-date help files for the latest version at Current Online Laserfiche Product Help Files. For further help or feedback, please see the Laserfiche Support Site. |
© 2013 Laserfiche |